|Before & After| English Village Project: Kitchen

I'm sad this project is over because these clients were really fun to work with! They were laid back and easy to please and really trusted my vision for their space. This project started out as a tiny powder bath & a small kitchen facelift. It turned in to more of a major kitchen facelift and half way through, the clients decided to add in their master bath and their outdoor patio space as well. I'm so pleased with how each space turned out! I'll stick to the kitchen here and share the other spaces in a separate post. 

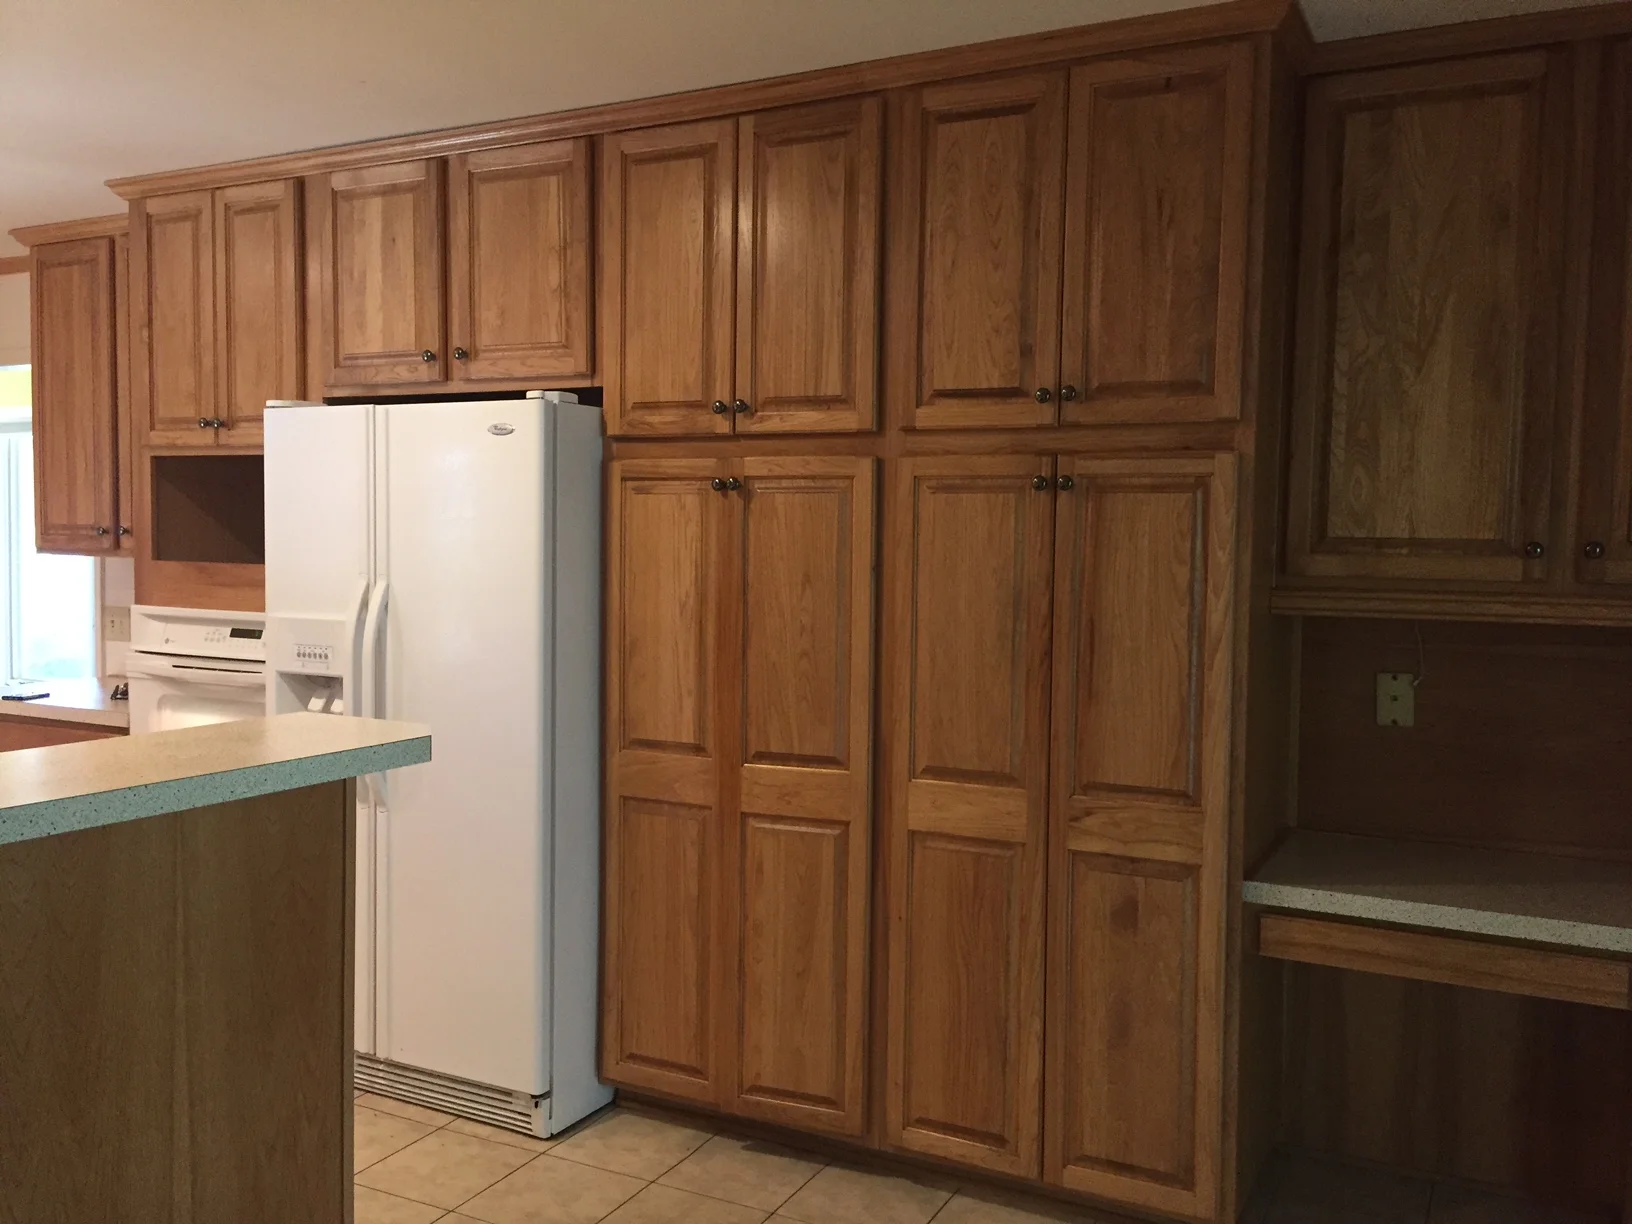
First.....the before:

before2.JPG
before3.JPG
before5.JPG

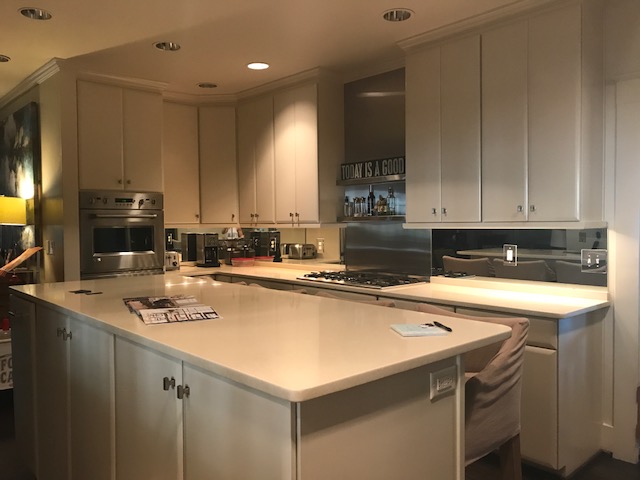
This kitchen design was only five years old, but the clients really wanted something different. The mirrored backsplash and the stainless steel shelving and accent wall made the space feel cold. The space doesn't get much natural light so one million recessed lights had been added to offset this, but it was too many and added a harsh, unflattering light. The clients wanted to make the kitchen feel more warm and inviting and I definitely think we accomplished that!!
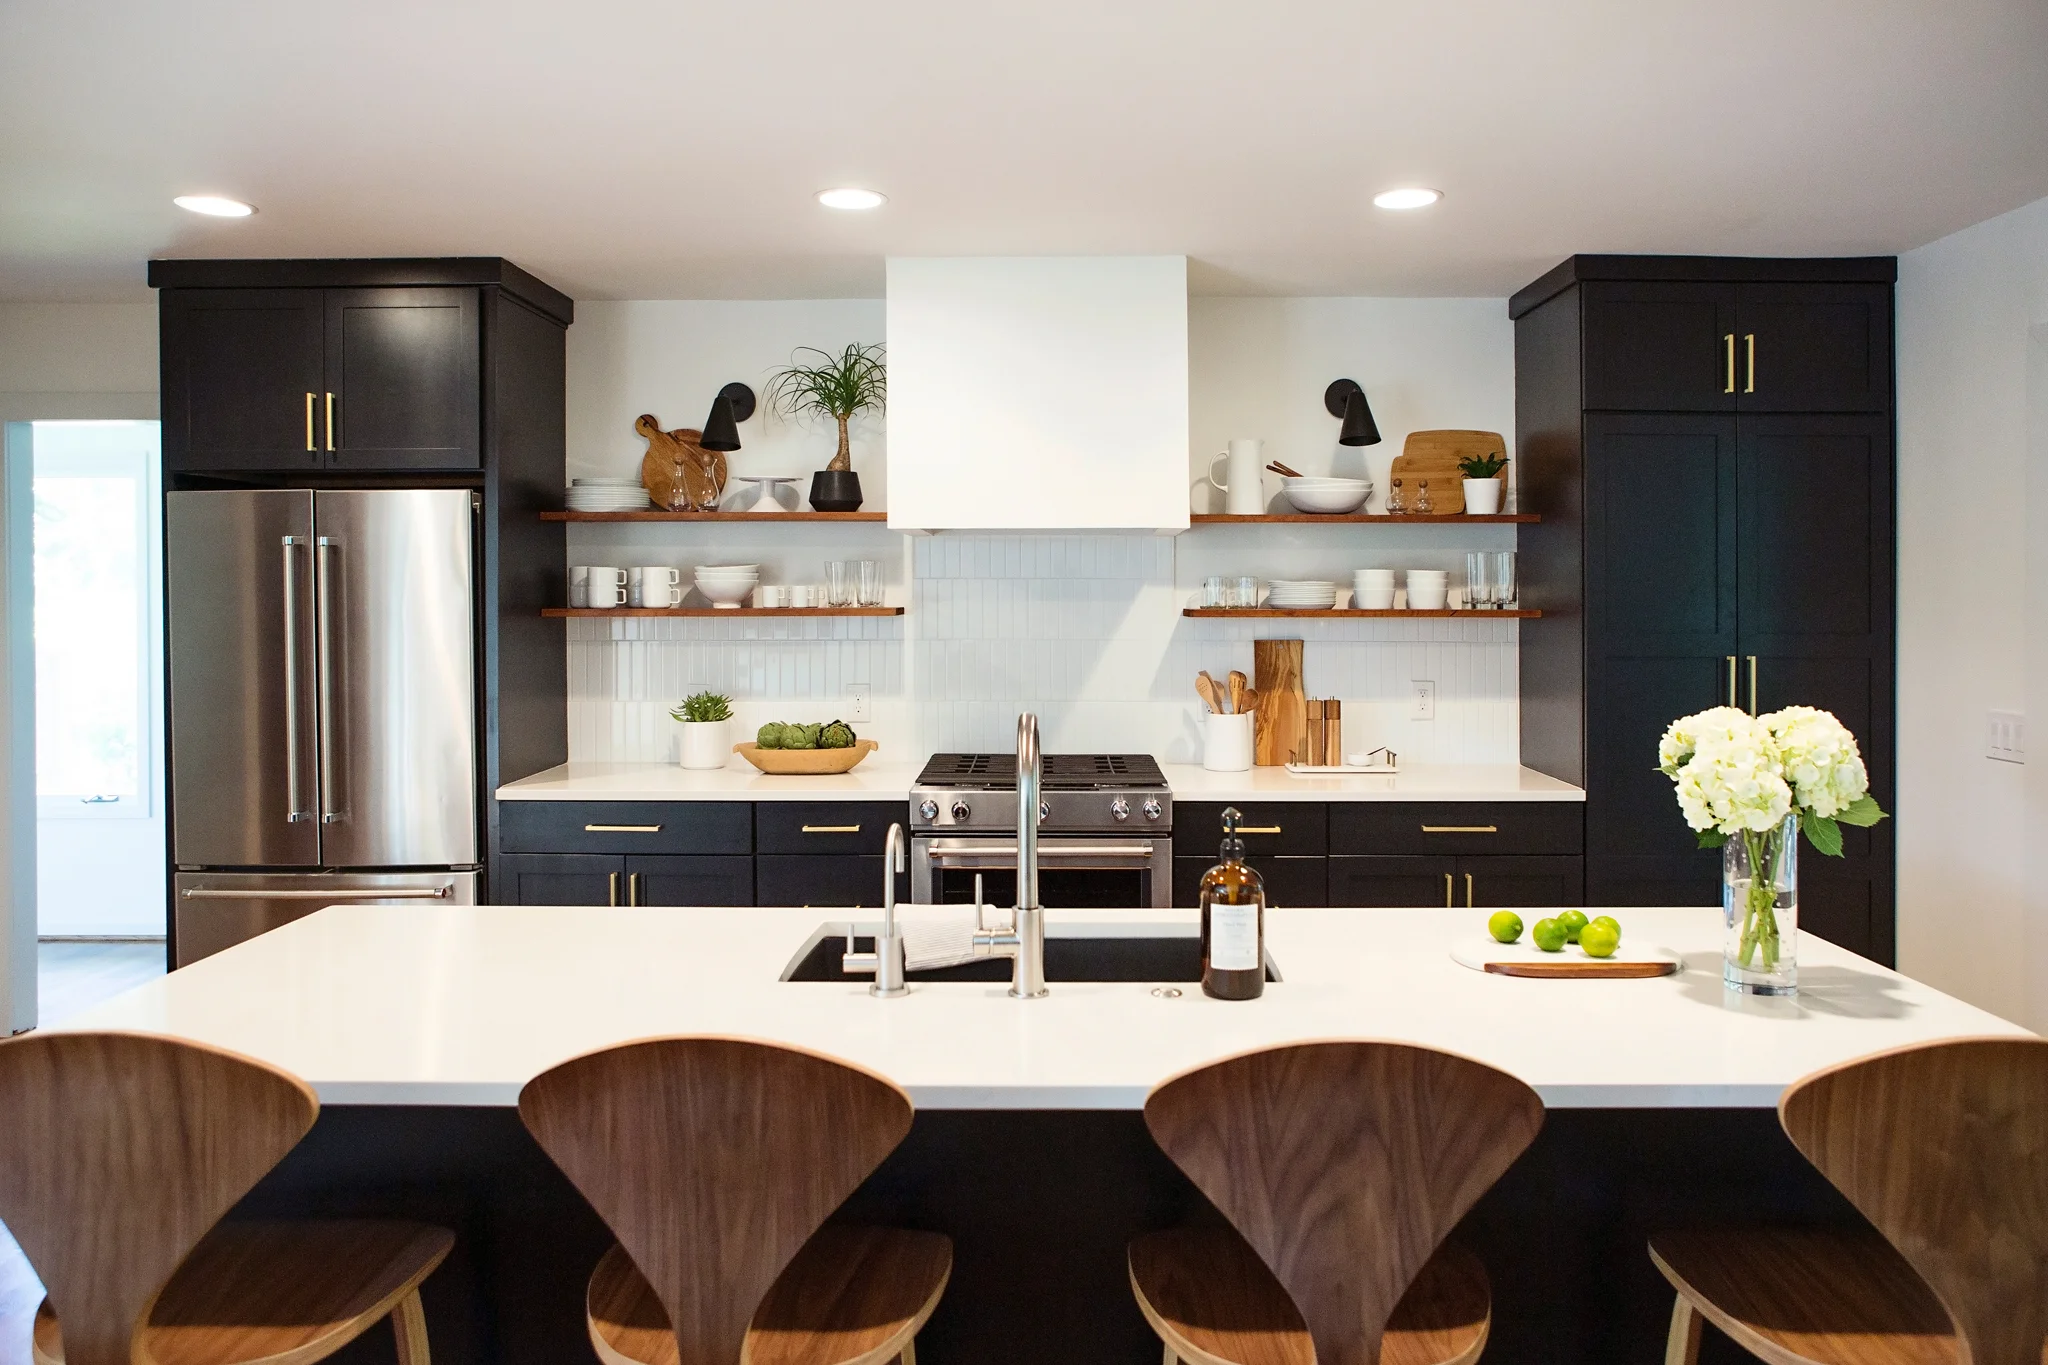
The afters:

IMG_9904 2.jpg
IMG_9899.jpg
IMG_9905.jpg
IMG_9915.jpg
IMG_9926.jpg
IMG_9937.jpg

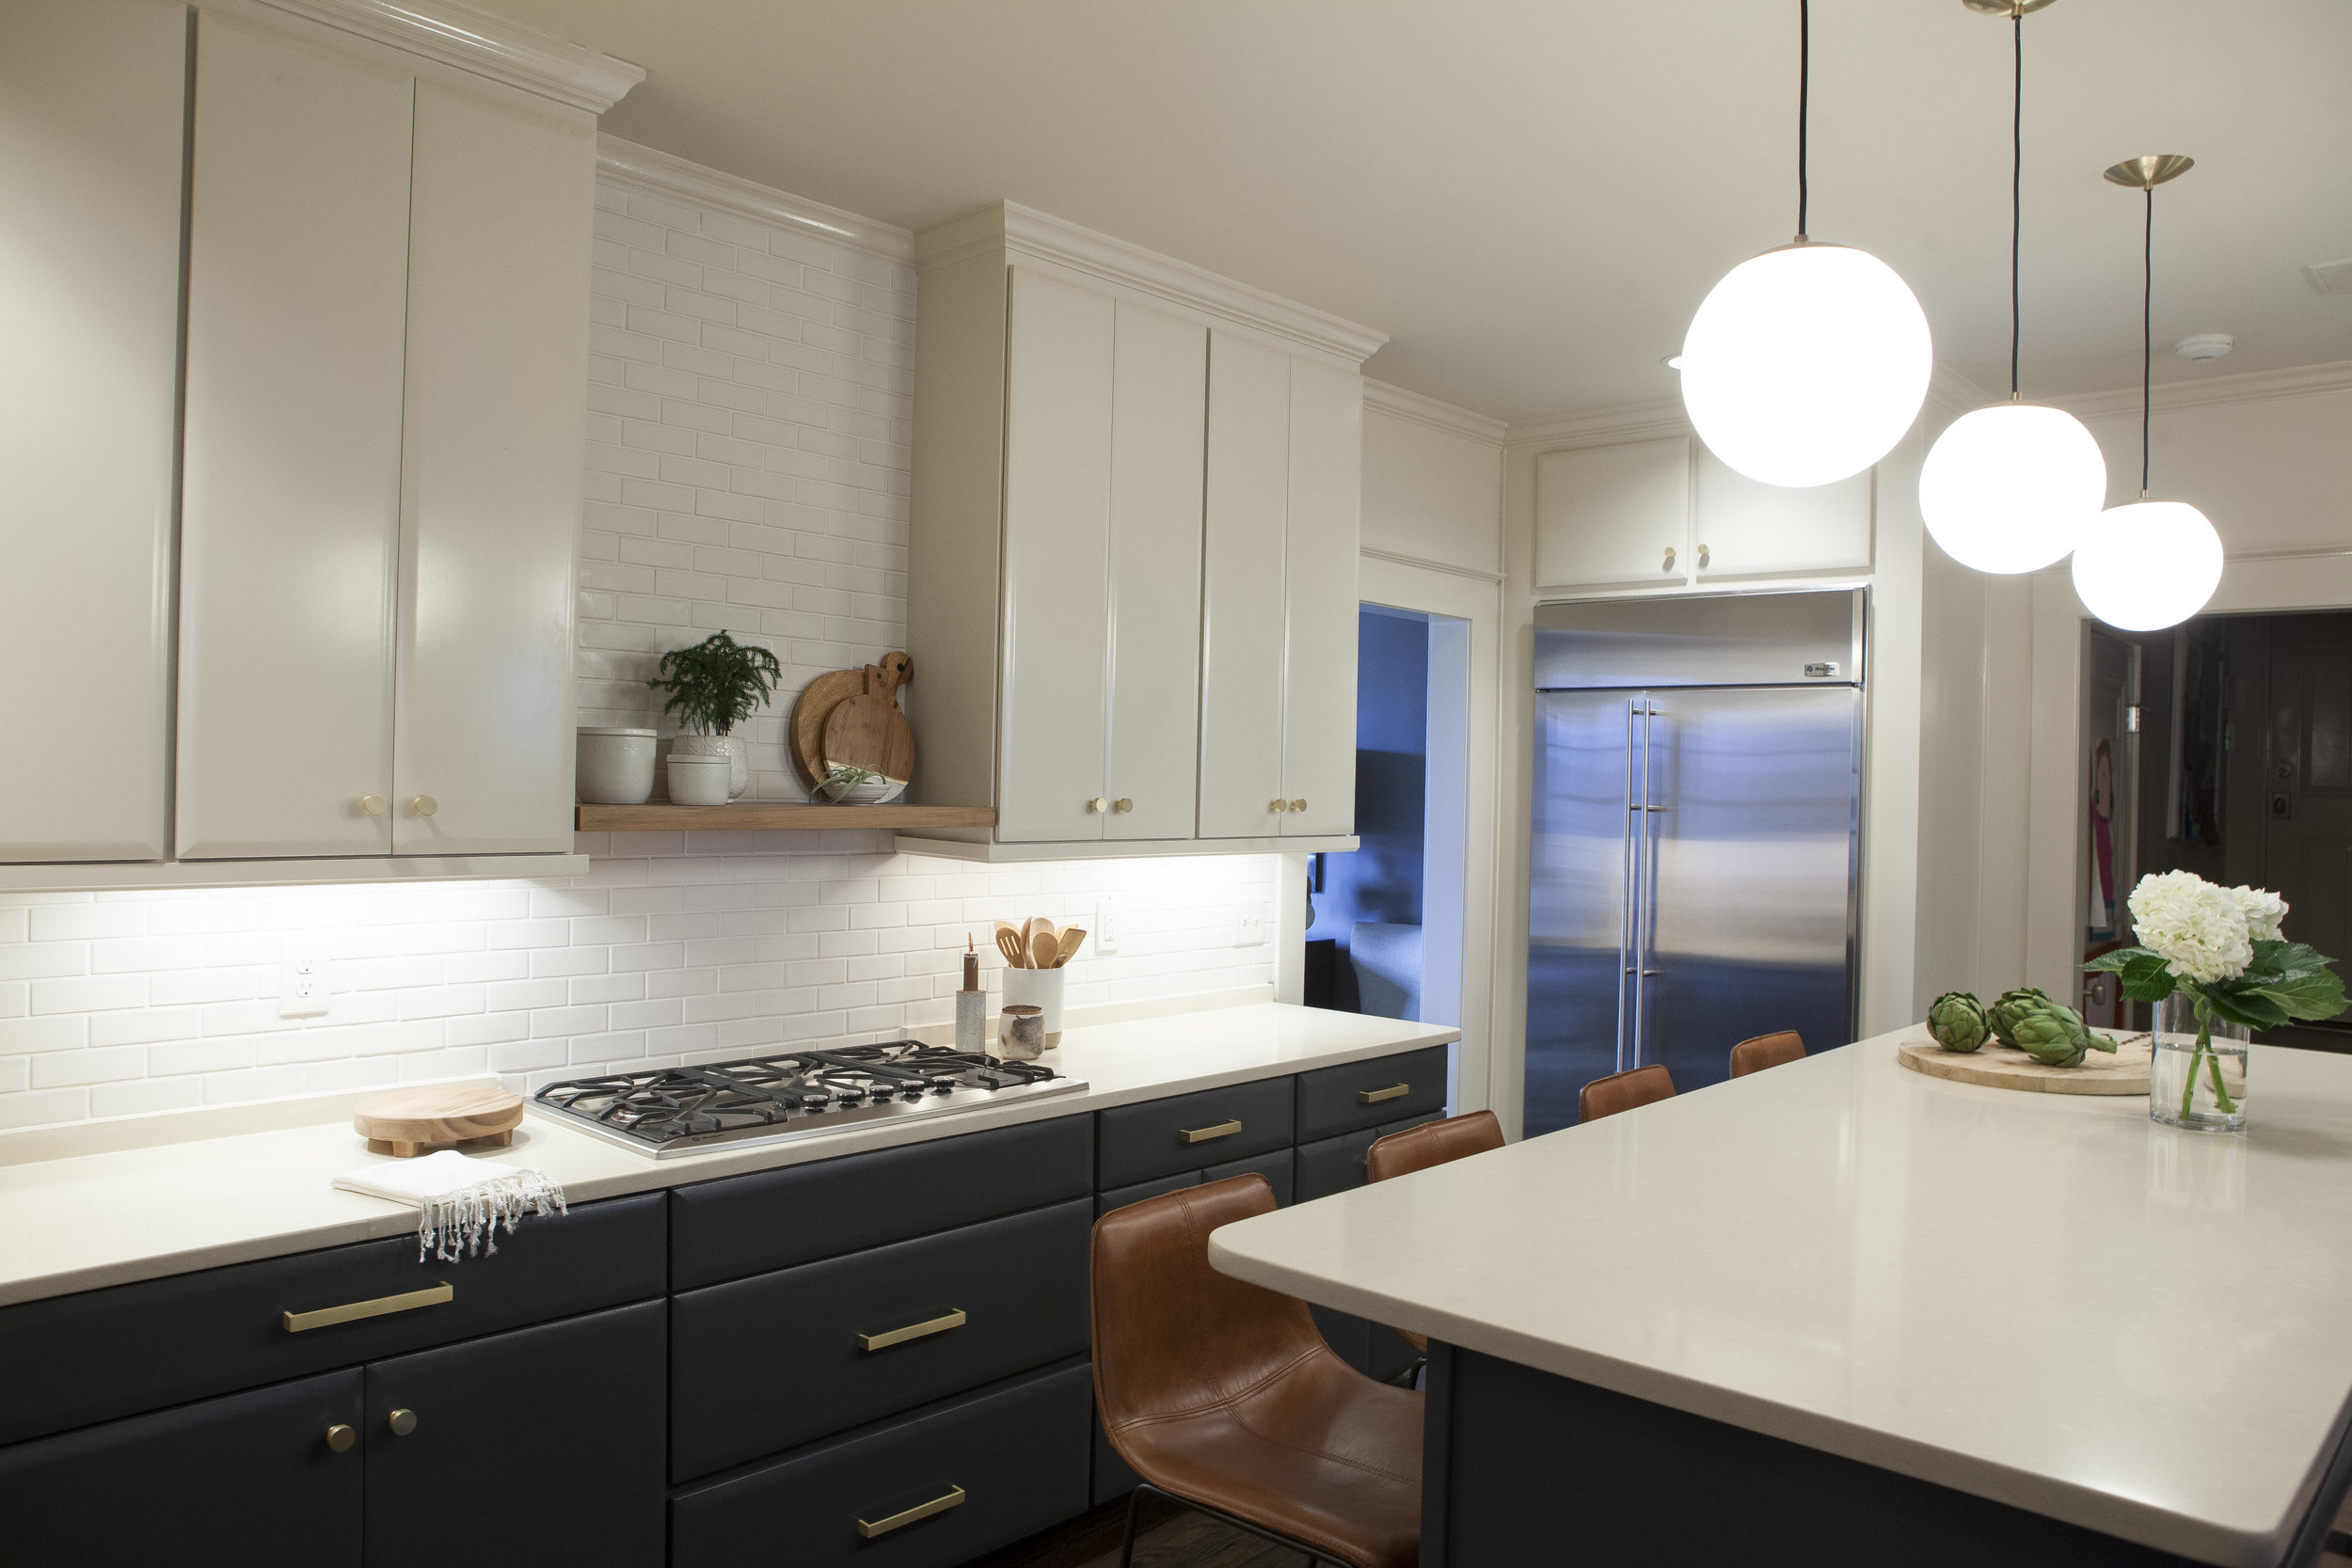
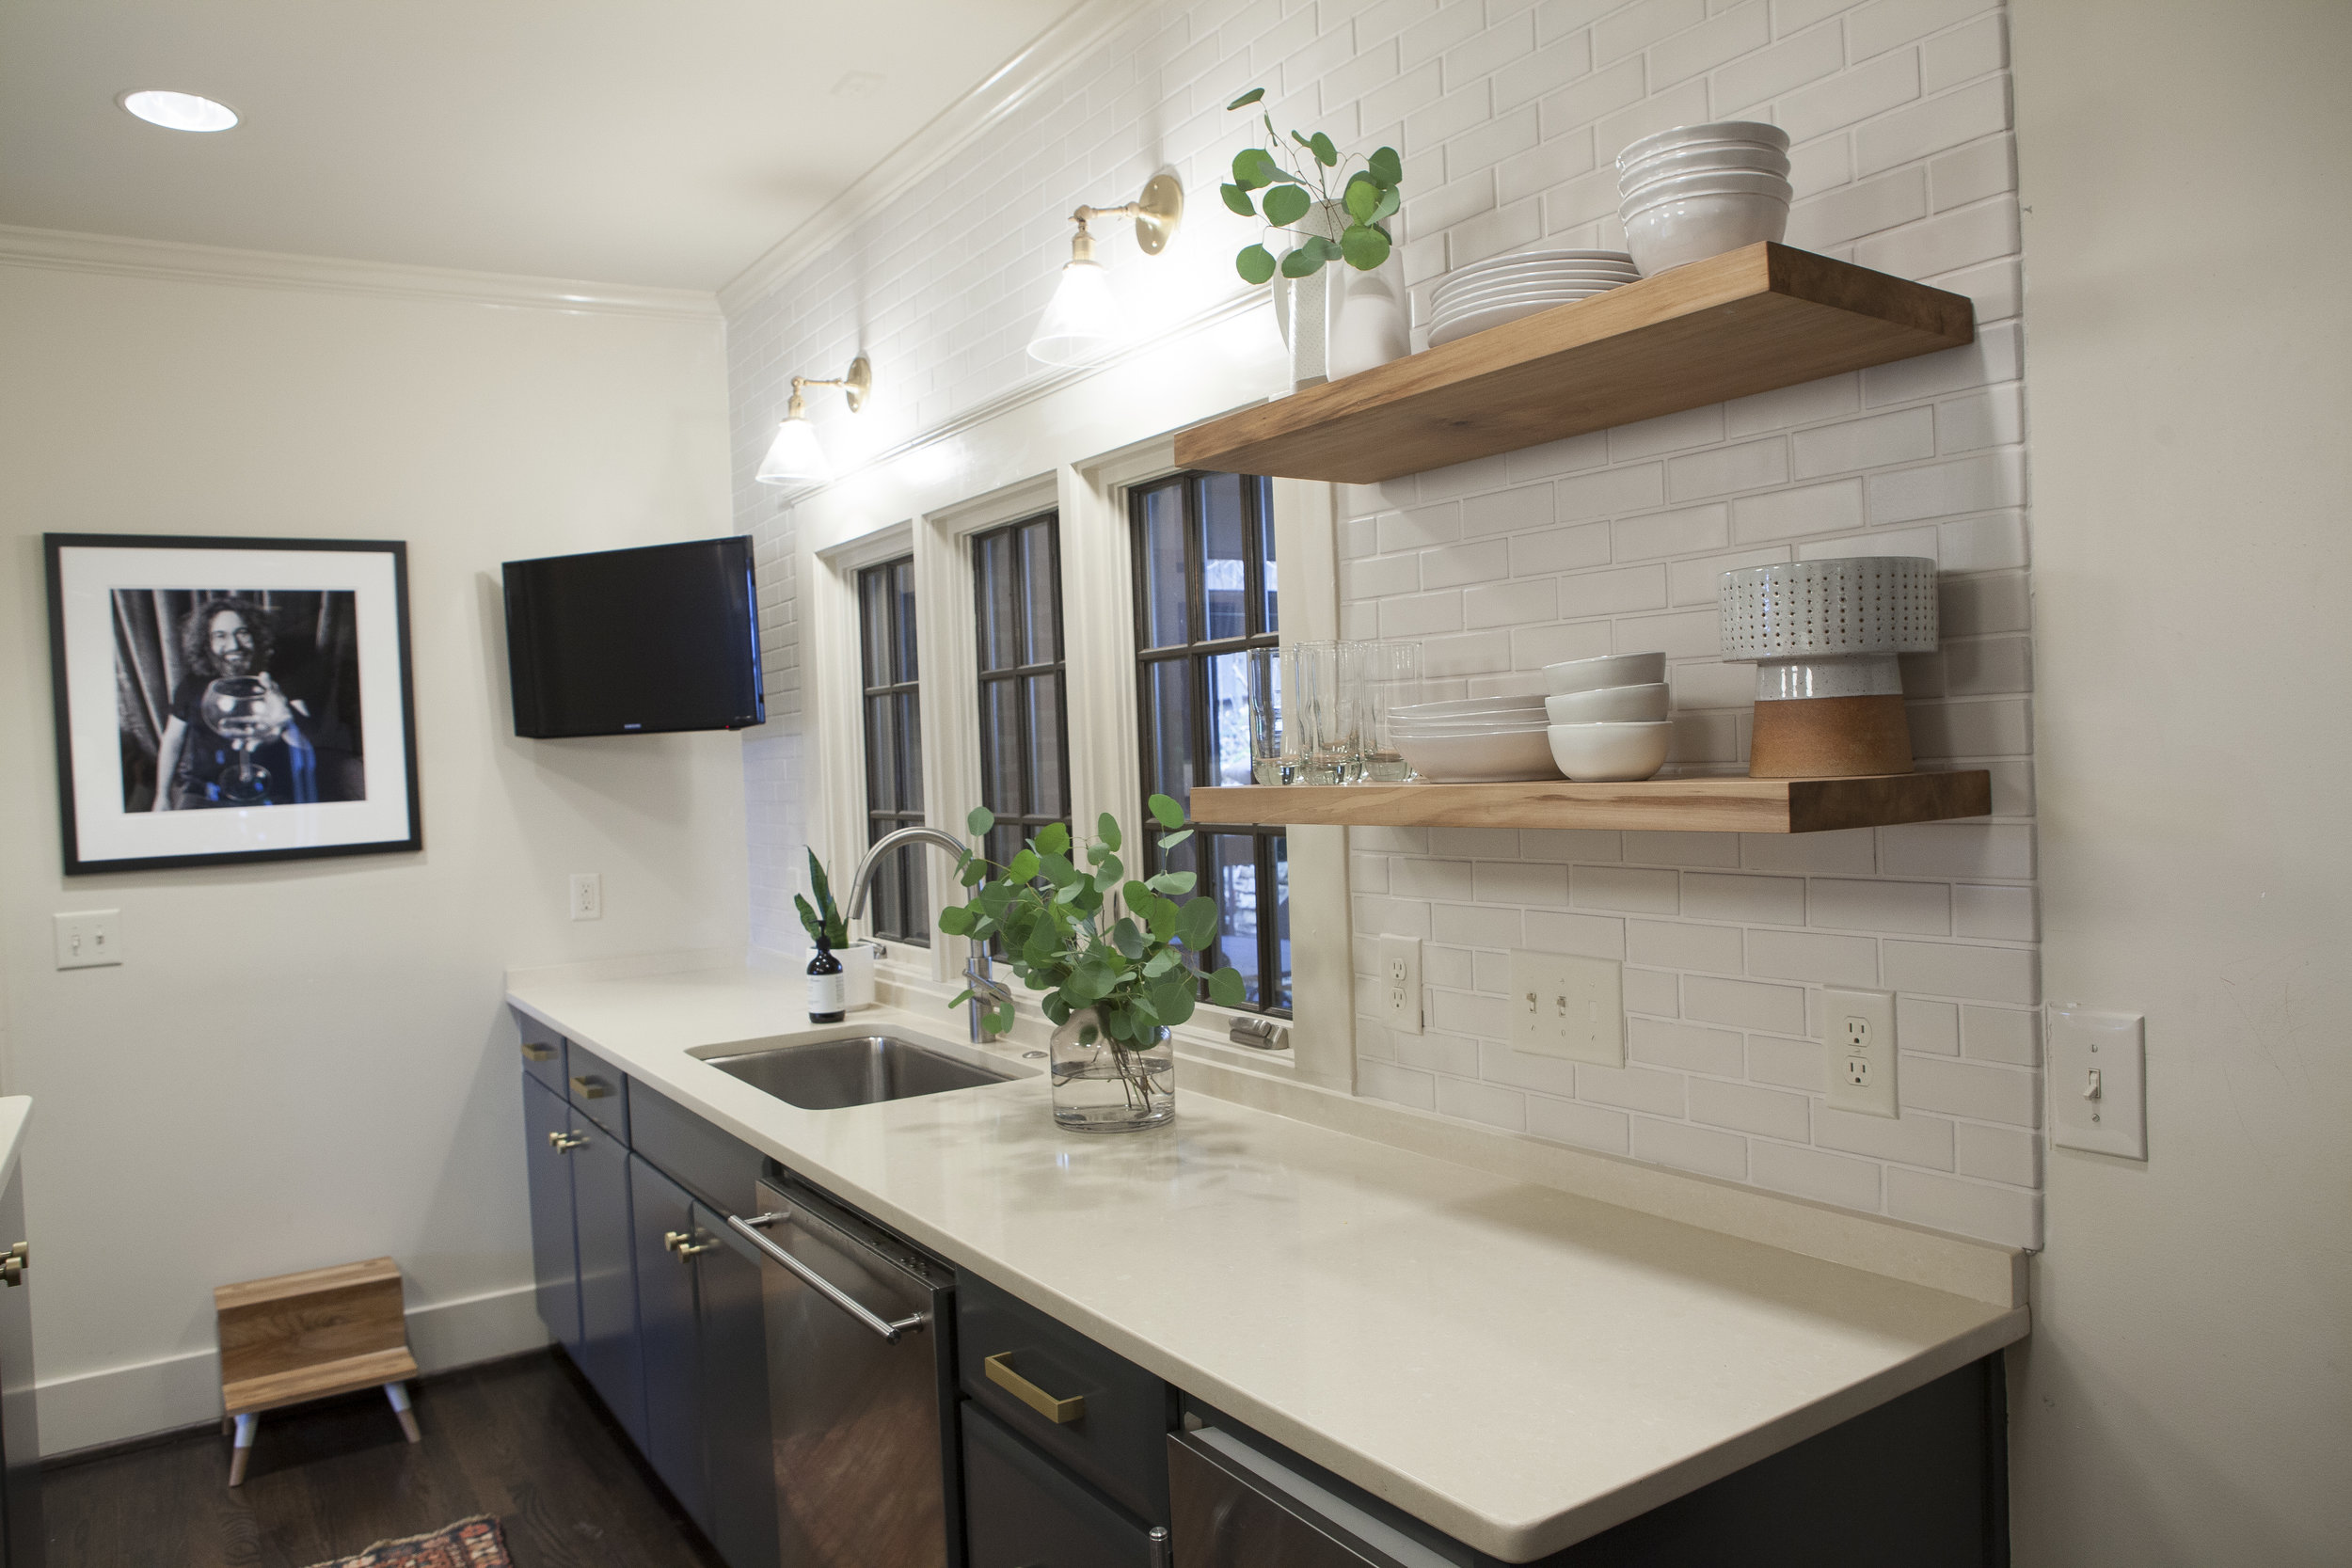
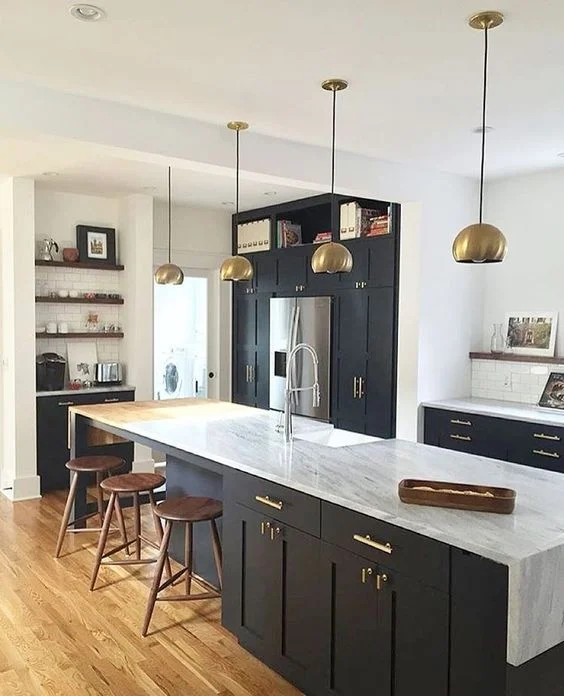
My plan for the space was to brighten it up, but also bring in warmth and depth. We removed many of the recessed lights and instead brought in pendants over the island and sconces over the sink that brought a soft, more flattering light. We added depth by painting the lower cabinets a beautiful, deep navy/charcoal color. For warmth, we selected handmade tile in a warm white in place of the mirrored backsplash and stainless steel insert above the cooktop. We repeated that same tile on the opposite wall from counter to ceiling to add visual interest. We replaced all the stainless steel shelving with floating wood shelves and we switched out the satin nickel hardware with warm brass. Leather barstools for the island and a vintage turkish runner with hints of coral and navy were the perfect accessories to finish out the space.  

There were no layout changes, major construction or demo, but the transformation is pretty dramatic!

Stay tuned for the bathrooms and outdoor spaces next!

|Before & After| My Kitchen!

I finally got the professional photos back of my house and I am so excited to share with you guys! There are a lot of pictures so I'm going to divide the spaces up into separate posts. We'll start with the kitchen. 

My husband and I knew this was our house the minute we pulled up, before we even set foot inside. We just had that feeling. When we walked in it was full of yellow walls, a mint green bathroom, a lot of wood paneling, light switch plates with brass eagles (not making that up) and an astroturf garage! But I saw the potential and I knew we could make it amazing. 

So first, the before kitchen pictures. 

oldkitchen4.JPG
oldkitchen1.JPG
oldkitchen2.JPG
oldkitchen3.JPG
wall between den and kitchen.JPG

And the after:

Deneke_091817_10.jpg
Deneke_091817_11.jpg
Deneke_091817_08.jpg
Deneke_091817_04.jpg
Deneke_091817_09.jpg
Deneke_091817_05.jpg

I'm still shocked when I look back at the before pictures. I can't believe the change!

We started by removing that paneled wall between the den and kitchen to open up the space. Taking that wall down brought in so much natural light and made both spaces feel larger. Next, we demoed everything including 6 layers of flooring in the kitchen (no lie) and all the cabinets and appliances. I'm so glad I went with my gut on the black cabinets even though almost everyone told me I was crazy. I LOVE them. And that backsplash - those 2x8 subway tiles are so good! They are still classic, but just different enough from the standard size. And having them Installed in a vertical pattern adds that modern twist that makes me so happy. I had a local company build my open shelves and I love the way they break up the dark cabinets and give me something to constantly re-arrange and style. 

You can't tell from the pictures, but the tall cabinets on the right side actually lead to a large walk in pantry. We stole some space from the garage to make that happen, which was my contractors genius idea. Even though it's hidden, its one of the best, most functional features of this kitchen and I'm so glad he thought of it. I plan to take some pictures and post about the pantry at some point. 

Check back soon for before & afters of the rest of the house!

Kitchen Sources: General Contractor: Lorino Construction, Cabinets: Brewer Cabinets, Tile: South Cypress, Open Shelving: Barnwood Customs, Hardware: Brandino Brass, Plumbing Fixtures: Fixtures & Finishes, Appliances: Kitchen Aid, Sconces: Cedar & Moss.

After Photos by Ashley Lauren Studios

Kitchen Moodboard: #clientmemyselfandi

If you follow on Instagram, you probably know that I've purchased a new home! And while it's got great bones and some amazing architectural features, it's in need of some updates! The first area to go will be the kitchen! Currently it's a room full of bad 90's oak cabinets and a diamond backsplash. Plus it's small and dark with a poor layout that is not functional. 

Here's the current kitchen: 

The wall on the left separates the kitchen from the den. This wall makes both rooms small and dark. So we are taking it out completely to open up the floor plan and bring in more natural light. I can't wait!

Here's a quick sketch of the new kitchen layout

Below is my moodboard for the new space. I'm bringing in lots of modern elements like open shelving, vertical subway tile and white quartz countertops), but still keeping a few classic elements like the shaker style cabinet doors.

Below are a few dreamy kitchens from my favorite designers that I have been obsessing over lately. 

via Kellen Minor (Kellen.Minor on insta)

via Kellen Minor (Kellen.Minor on insta)

We should start demo in a few weeks. Stayed tuned for more updates!